Archive for the ‘25 days of Christmas’ Category
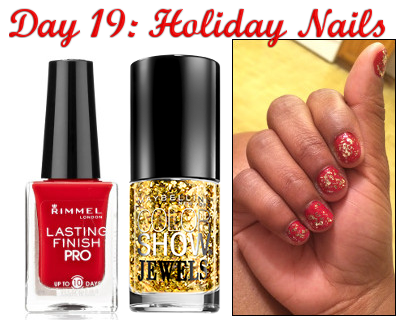
Here’s another way to jazz yourself up for the holidays. I wanted something festive for one of our family parties. Unfortunately when I went looking for a metallic gold nail polish, I couldn’t find one that wasn’t $10 or more. Instead, I picked up a sparkly gold $5 choice from the Maybelline section and decided to pair it with a red I already own.
It took some getting used to, but I think I like it. Please ignore the actual state of my nails.
Red: Rimmel Lasting Finish Pro in Stiletto Red
Gold: Maybelline Color Show Jewels in Gilded in Gold

Our family has gotten really into playing games lately. I decided that at this year’s Christmas party, we should have an epic Lip Sync Battle. There are a few people that I can count on to be enthusiastic participants and they came through for me. We had five contestants and three rounds. The competition was a huge hit with our friends and family. We’re considering making it an annual battle.
However, there was a major difference between our Lip Sync Battle and the television show – we had judges. There were three judges, age 15-50. You know what judges need, right? Dancing with the Stars-esque paddles. In a moment where I thought I was the crafty person I’ve always wanted to be, I had the brilliant idea that I would make the judging paddles. Honestly, I’m quite proud of them. If you’re interested in creating a set of your own, check out my instructions below. (Note: I got all of the paints at Michaels and spent maybe $12 using a coupon.)
DIY Judging Paddles
Supplies: Dollar Tree Paddles (the ones with the ball and string attached), Scotch Tape, Paintbrush, Folk Art Home Decor Chalkboard Paint in Black, Craft Smart Metallic Paint in Gold, Craft Smart Glitter Paint in Champagne
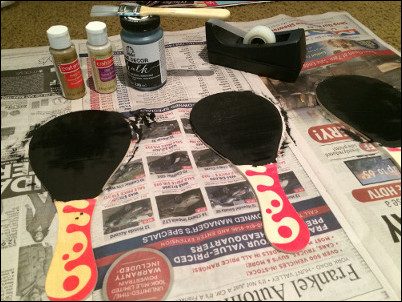
First, cut the string and remove the string and ball from the paddle. Since there’s a design on the front of the paddles, this is the side I painted with chalkboard paint. The instructions on the bottle say to let it dry for two hours after each coat. Because this was my first time using chalkboard paint, I adhered to that time frame. If you’ve used it before and know it takes less time, by all means, go with what works for you.

This tree has actually been decorated for over a week now. I was originally going to do a before and after. Clearly, I did not. I didn’t get any pictures of the tree or decorating process. So what I’m left with to share is the final version. I’m a big fan of the tree this year. I feel like it came out really well and if ever there was a year where I needed a well put together tree, this was it.
There are more gifts under there than what’s shown. The right side has a stack obscured by the huge bag in the front. By the day after Christmas, there will hardly be anything under there. It seems that the gifts that come in are a lot smaller than those that go out. Not that I’m complaining.
I hope your tree came out gorgeous!
